Scriptimate: an open source tool to create SVG animations in a coding way
When we were working on the landing page for https://tracklify.com we clearly realized that nothing could explain Tracklify's idea better than small and short animated videos which could be injected into the web page. Because:
- Most people are too lazy or too busy to read
- Static images can't explain a whole flow
- Screencasts are good but for landing pages where the crowd of "cold" users quickly scrolls the page they don't work well: the users have to open video in full screen or they will struggle of recognizing smaller elements (especially on mobile devices) plus human who records a screencast is slower then scripted animation and can't explain the concept in 10 seconds. The worst thing here: if some element or color has to be adjusted in the future we will have to do all recording work again.
So, we had only Figma design which allows exporting elements (task cards, buttons, etc) as qualitative vector images (SVG files) and we wanted to reuse them for animations.
Struggling with existing animation tools
We imported SVG files from Figma into Adobe Animate and After Effects but some SVG elements were broken after import: some lost strokes, other lost polygons some were resized. Probably it plays well with Adobe Illustrator exports, but we wanted to stay with Figma. Also, the UI of Adobe tools looks overcomplicated for our simple task, we wanted to have fewer operations on existing well-looking SVGs like move/scale/rotate/change opacity/change text in the simplest way possible. We also tried SVGAtor which crashed on the first import attempt, on the second attempt it lost all raster inlines (avatar elements) that were in SVGs 🙄
Birth of Scriptimate
However, all SVG files were rendered perfectly in the browser. An option to create browser CSS-based animations is very limited:
- CSS language is not convenient for long-running scenarios
- It is not so platform-independent as video
- Calculating absolute positions in animated CSS turns in pain when working with different screen sizes
- It involves users CPU much more than playing video, on slower devices animation might lag
So another idea came to our minds: what if we use the browser to arrange all elements, allow the browser to render them perfectly, and after that take a screenshot. Then repeat for each frame, 25 frames per second, and... compile frames into a video file using an encoder. So we created Scriptimate which automated all these actions.
Basically, Scriptimate is an OpenSource script (could be executed with npx without installation). All animations are defined in a simple way in a script file (.smte). Scriptimate command-line utility converts .smte file into mp4/webm/animaged gif.
How it works under the hood:
- It reads .smte file which defines animations with a simple scripting language
- Calculates frames (.html files)
- Runs Puppeteer headless browser for each file
- Runs powerful FFmpeg encoder to create video in desired formats with well-tuned compression/quality options
The benefits of Scriptimate:
- You define all your behaviors in a text file in any text editor – easy to change, easy to write, could be saved to your code repository
- You can use any SVG files. If they are rendered well in Chromium-based browser they will look well here. Browser is capable with majority of SVG versions exported from Drawing tool.
- If you want to change SVG file - you just draw on it and reexport to a folder, then one command will generate all video formats, no need to recall how to make 20 clicks in UI tools
- Scriptimate binary in one run creates stable production assets (final video files) from the text script file and SVGs, and this could be done anywhere: on your colleagues machine or integrated in Docker pipline on your web app CI flow
- Since we use ffmpeg you have flexibility to control quality/file size balance and get the best value from it
- You can create multiple files in one run (e.g. to feed several video sources - modern browsers might consume smaller webm when old browsers will rollback to heavy mp4)
Hello world animation using scriptimate
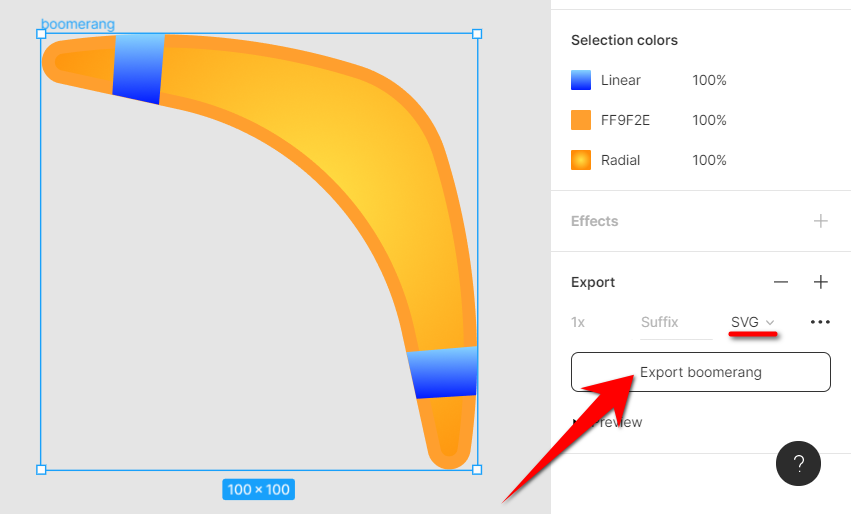
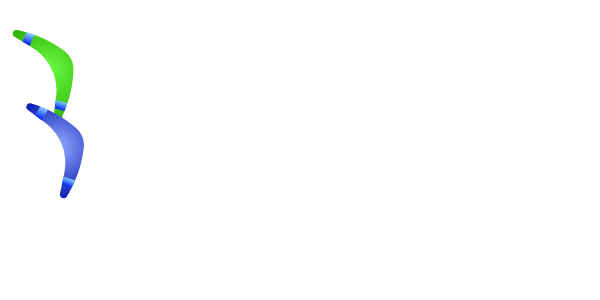
I created one simple boomerang in Figma, and exported it using Export button:
Now let's create text file helloworld.smte and add next commands there:
set_frame_size 600 300
place boomerang 0 100
animate_3000 move boomerang 500 -
- Each script should begin with set_frame_size command which defines video dimensions. Here we set video width to 600px and video height to 300px
- place x command looks for x.svg file and places it at defined position (x:0, y:100), so initially, our boomerang fits on the left side of the frame and should be vertically centered (height of svg is 100, and we place it to y:100 when total height is 300)
- animate_3000 command defines 3 seconds (3000 ms) animation, animation action is move to position x:500, y:100 (dash char means that position will not be changed), so during 3 seconds boomerang should slide right
As commonly used, the first param always defines horizontal dimension (width, x coordinate, left position, etc) and the second param defines vertical dimension (height, y coordinate, top position)
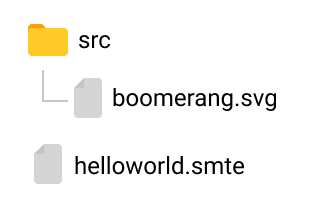
In the same folder, near with .smte file we should create a folder named src and place boomerang.svg file inside:
Now run scriptimate:
npx scriptimate@latest -i helloworld.smte -f gif
You should see next output:
🎥 Format selected: gif
📁 Filename helloworld.gif
📺 Resolution: 600x300
✂ Start from second: 0s
And get this .gif file in the same folder near .smte file:

Pre requirements
To make scriptimate work you need ffmpeg binary and some binary libraries used by pupeteer on your system. On Ubuntu and Windows (Inside of WSL2) you can install them via apt:
sudo apt-get install libnss3-dev libatk-bridge2.0-0 libcups2 libgtk-3-0 libgbm-dev ffmpeg
Main scriptimate CLI arguments
- -f FORMAT – could be gif, webm, mp4. If you need multiple video format created in one run define them via comma, e.g. "mp4,webm"
- -fps FPS – frames per second of the output video
- -fn FILENAME – output filename base if you need to use a specific name for output file (e.g. to improve your automation pipelines). By default script name is used.
- -fs FROMSECOND – skip some seconds of rendering, might be useful when you work on large animations
To see list of all arguments use npx scriptimate@latest -h
Rotating, scaling and changing opacity
Let's define several consequent animations:
set_frame_size 600 300
place boomerang 0 100
animate_1000 move boomerang 250 -
animate_1000 rotate boomerang 360
animate_1000 scale boomerang 2
animate_1000 opacity boomerang 0
- First 1 second moves boomerang to the center
- Second rotates it by 360 degrees (full spin around central point)
- Third scales up to x2 size
- Last one hides element smoothly by changing opacity to 0

Parallel animations
You can merge actions with double ampersand to run same animation actions in parallel:
set_frame_size 600 300
place boomerang 0 100
animate_1000 move boomerang 400 - && rotate boomerang 720 && scale boomerang 2
Please note that rotating by 720 degrees means boomerang will make 2 full spins

Constants and expressions
For more complex animations when the number of gaps, sizes and margin grows it is hard to understand numbers. That's why you can replace them with human-readable names and even apply some arithmetics:
const $frameWidth=600 $frameHeight=300
const $numberOfSpins=5
const $ScaleFactor=0.01

set_frame_size $frameWidth $frameHeight
place boomerang 0 $frameHeight-$boomerang__HEIGHT
animate_1000 move boomerang $frameWidth-$boomerang__WIDTH 0 && rotate boomerang 360*$numberOfSpins && scale boomerang $ScaleFactor
- The first 3 lines define 4 constants (you can define as many constants as you want on one line via whitespace or just define each constant on a new line)
- $boomerang__WIDTH and $boomerang__HEIGHT are predefined auto-created constants that have dimensions of each SVG element that you use
- When we place boomerang we calculate Y position using subtraction:
$frameHeight-$boomerang__HEIGHTso the box with SVG (100x100) will sit at X:0, Y:200 which is the bottom left corner

Easing
To make your animations smooth and beautiful you can use easing modes. We implemented the 3 most popular, but you can request more from formulas list:
- easein
- easeout
- easeinout
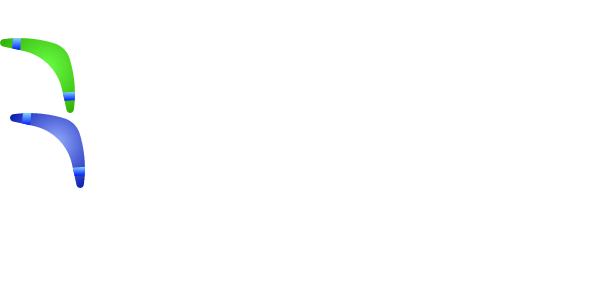
I created 4 smaller boomerangs (75x75) to show you the difference:
set_frame_size 600 300

place boomerang1 0 0
place boomerang2 0 $boomerang1__HEIGHT
place boomerang3 0 $boomerang1__HEIGHT*2
place boomerang4 0 $boomerang1__HEIGHT*3

animate_3000 move boomerang1 600-$boomerang1__WIDTH -
  && move easein boomerang2 600-$boomerang1__WIDTH -
  && move easeout boomerang3 600-$boomerang1__WIDTH -
  && move easeinout boomerang4 600-$boomerang1__WIDTH -

Just look at the example above. They all reach their destination at the same time, but acceleration is different. Actually it is how easing works anyway: CSS in browser or any other animation tool. Scriptimate makes it easier to see.
Groups that allow you to implement independent scenarios
All videos shown above are very primitive, even if something happens in parallel it is defined within the same animation duration. In a real animation task, you might want to have different "scenario lines" which should live their independent lives.
Here is an example:
const $frameW=600 $frameH=300
set_frame_size $frameW $frameH

place boomerang1 0 $boomerang1__HEIGHT/2
place boomerang2 0 $boomerang1__HEIGHT*3/2


define_group scenario1:
  animate_1000 move easein boomerang1 270 -
  animate_2000 move easeout boomerang1 $frameW-$boomerang1__WIDTH $frameH-$boomerang1__HEIGHT


define_group scenario2:
  animate_1000 move boomerang2 250 -
  animate_1000 pause
  animate_1000 move boomerang2 $frameW-$boomerang1__WIDTH 0


run_groups_together scenario1 scenario2
If you read the code you will see that the group called scenario1 controls life for the blue boomerang and the group called scenario2 controls life for the green boomerang. Actually, it is not a constraint because you can even define a third group that will rotate both SVGs independently during all their lifetime
const $frameW=600 $frameH=300
set_frame_size $frameW $frameH

place boomerang1 0 $boomerang1__HEIGHT/2
place boomerang2 0 $boomerang1__HEIGHT*3/2


define_group scenario1:
  animate_1000 move easein boomerang1 270 -
  animate_2000 move easeout boomerang1 $frameW-$boomerang1__WIDTH $frameH-$boomerang1__HEIGHT


define_group scenario2:
  animate_1000 move boomerang2 250 -
  animate_1000 pause
  animate_1000 move boomerang2 $frameW-$boomerang1__WIDTH 0

define_group rotator:
  animate_3000 rotate boomerang1 360*4 && rotate boomerang2 360*5

run_groups_together scenario1 scenario2 rotator
Instead of conclusion
We really hope you will love scriptimate or at least will recall about it when you will need an easy tool for animations.
There are also several other features that are not covered in this presentation guide. For example hidden zones, text changing and typing, JavaScript code evaluation. However, if we receive public approval of our scriptimate idea (post shares, Github stars and so on), we will happily explore in new posts
Useful links:
- Landing page with example of videos created with scriptimate https://tracklify.com
- GitHub repo with examples of usage: https://github.com/devforth/scriptimate
- Scriptimate on npm https://www.npmjs.com/package/scriptimate
- Our Devforth blog: https://devforth.io/blog/